Saving a SwiftUI view to Photos

Many shapes and patterns can be created using Path and Canvas in SwiftUI. It would be great to be able to save these as images in the Photo Library. This is possible using UIKit, by first converting the SwiftUI View to UIImage and then saving this image to Photos.
Access to Photos library
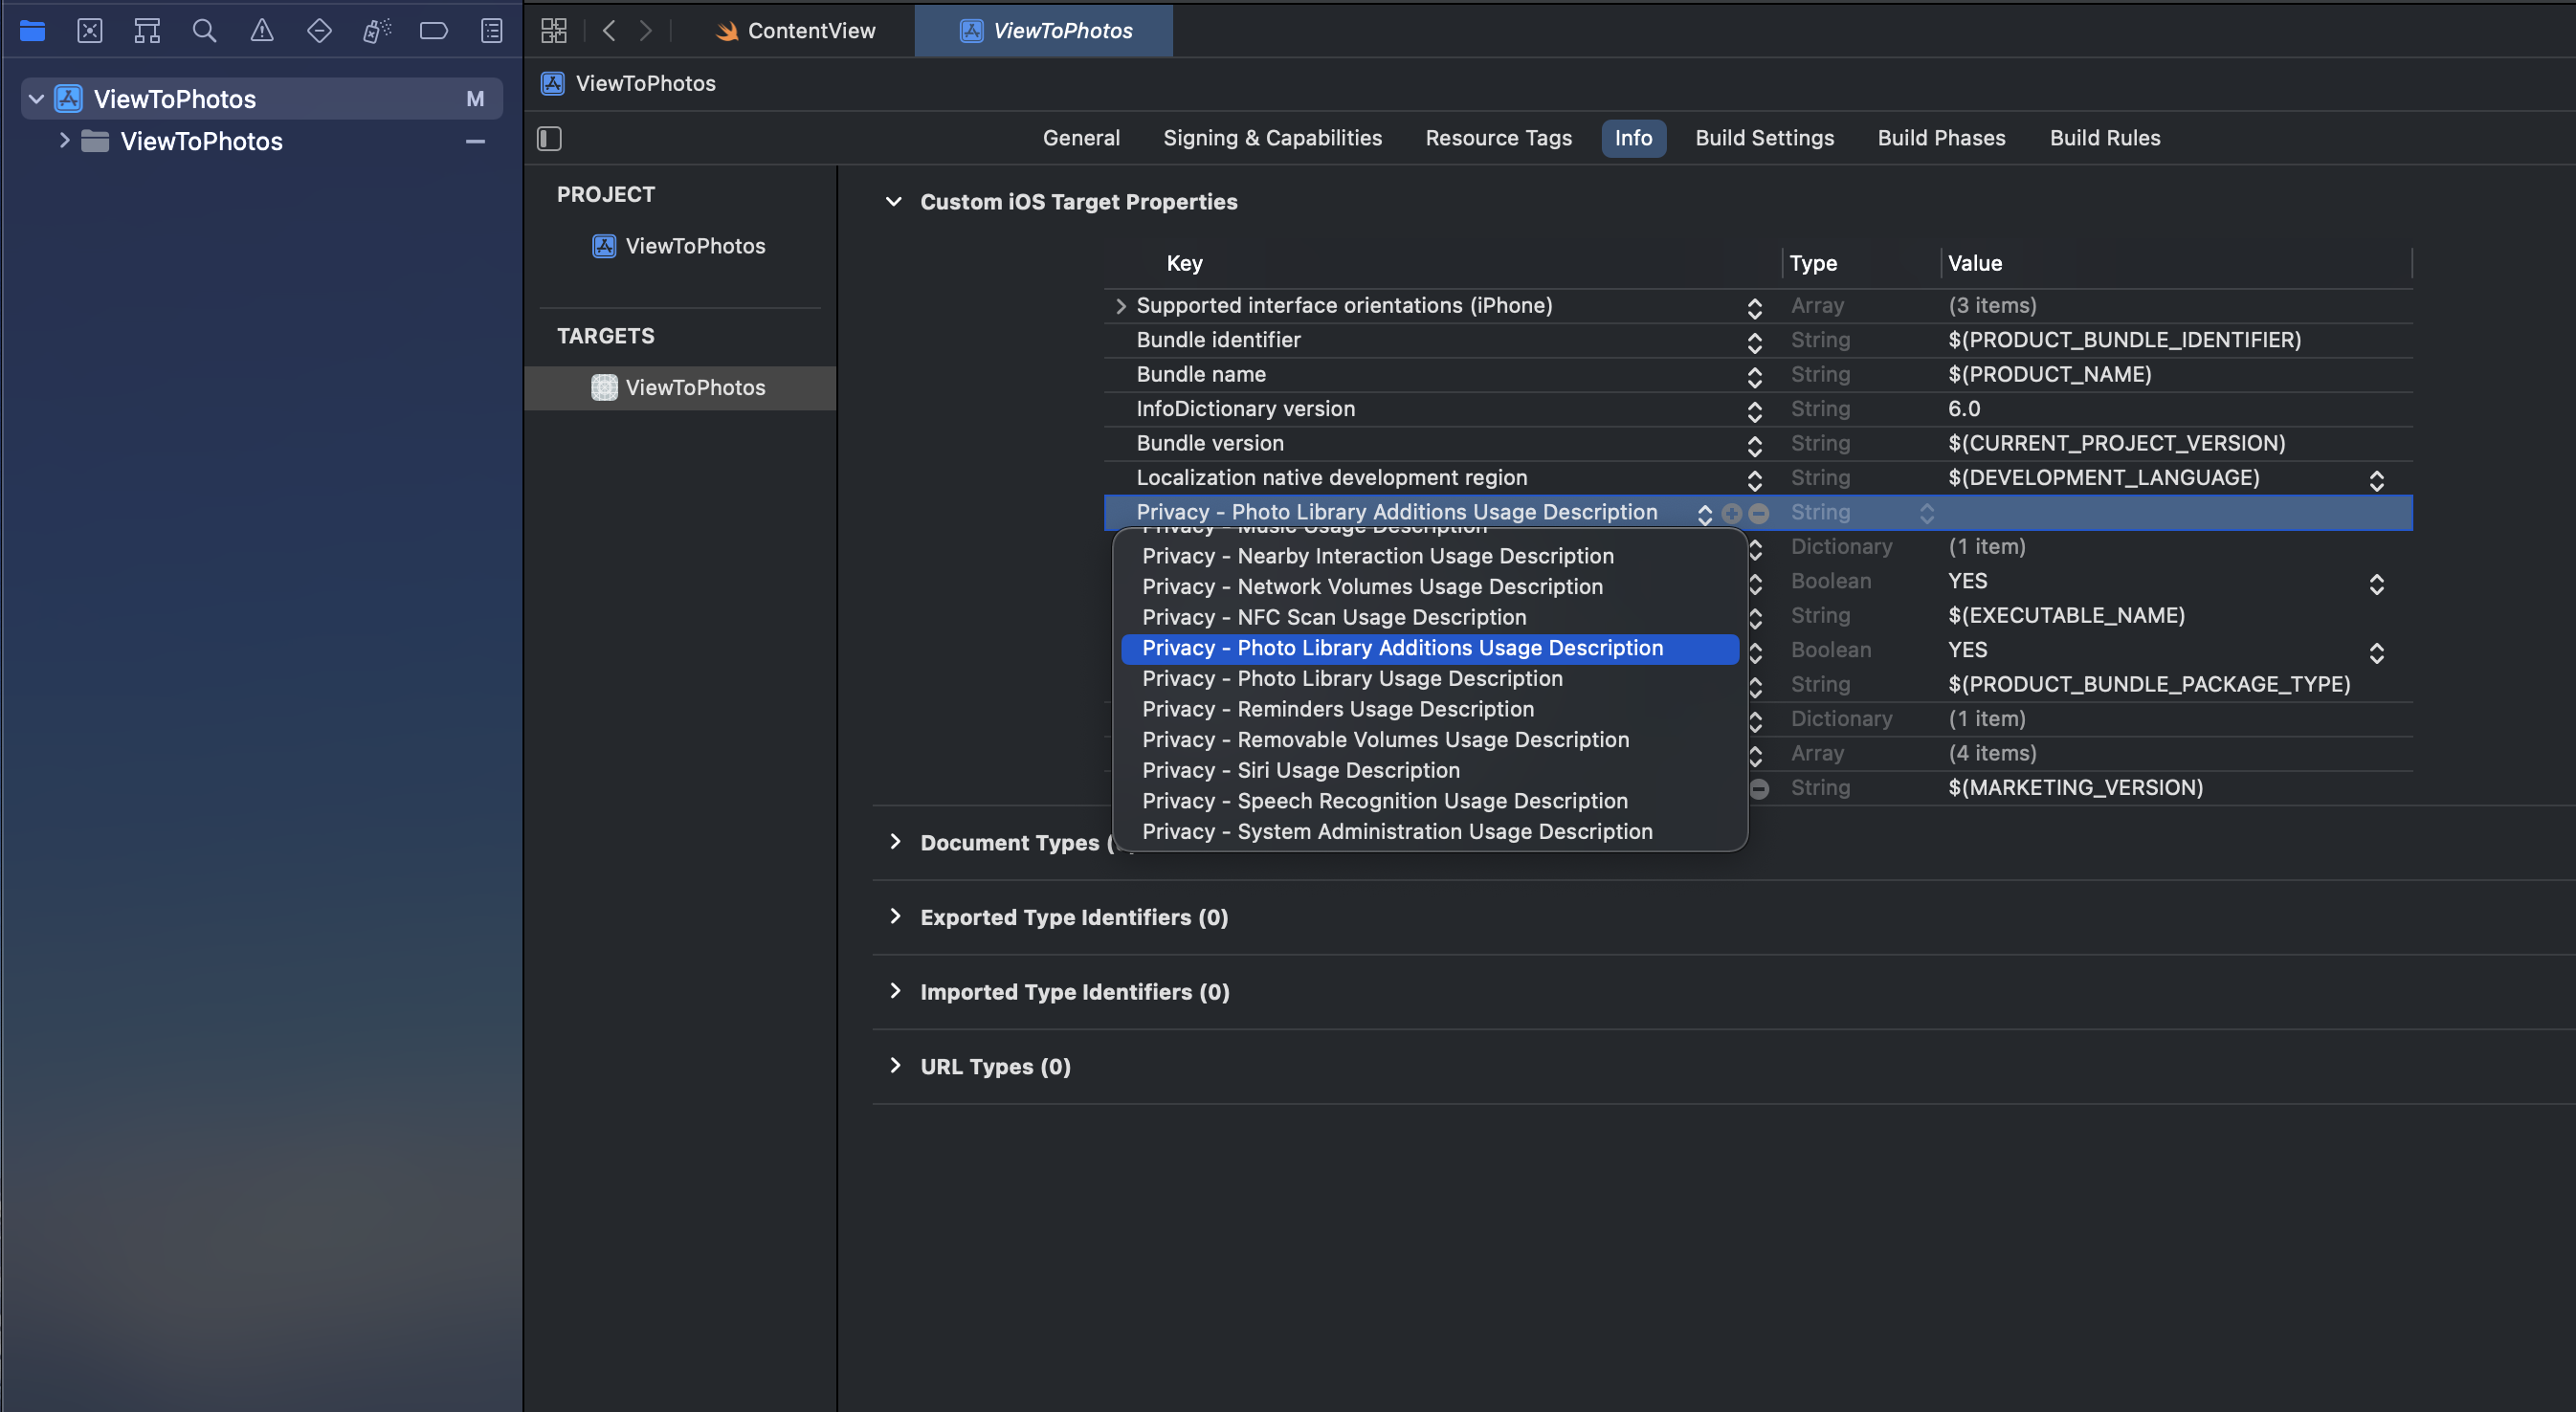
In order to save an image to the Photo Library, the app has to be granted access by the user. It is necessary to set a property NSPhotoLibraryAddUsageDescription in the App Targets info.plist. This is set in Project > Targets > Info and adding a new key "Privacy - Photo Library Additions Usage Description". The text that is entered here is presented to the user when the App first tries to save an image to the Photos Library. This is related to built-in privacy protections, so that any app may only access the user’s Photos library if authorised. more information available at Delivering an Enhanced Privacy Experience in Your Photos App.
If this property is not set, the App will crash when trying to access the Photos Library.
... ViewToPhotos[xxx] [access] This app has crashed because it attempted to access privacy-sensitive data without a usage description. The app's Info.plist must contain an NSPhotoLibraryAddUsageDescription key with a string value explaining to the user how the app uses this data.
Save an image to Photos
Add an image to the Assets for the App. An instance of UIImage is created in the SwiftUI view and UIImageWriteToSavedPhotosAlbum is used to add the image to the Photo Library on the device. The Alert will show the first time the App tries to add an image to the Photo Library, allowing the user to grant (or not) access to this feature. This sets a setting for the App that can be changed later in Settings App on the device.
 1struct SaveImageView: View {
 2
 3    let image = UIImage(named: "cake")!
 4
 5    var body: some View {
 6        VStack {
 7            Text("Sticky Toffee Cake")
 8
 9            Image(uiImage: image)
10                .resizable()
11                .scaledToFill()
12                .frame(width: 250, height: 220, alignment: .center)
13                .clipped()
14
15            Spacer().frame(height:100)
16
17            Button {
18                UIImageWriteToSavedPhotosAlbum(image, nil, nil, nil)
19            } label: {
20                HStack {
21                    Image(systemName: "photo.on.rectangle.angled")
22                    Text("Add to Photos")
23                }
24                .font(.title)
25                .foregroundColor(.purple)
26            }
27            Spacer()
28        }
29    }
30}
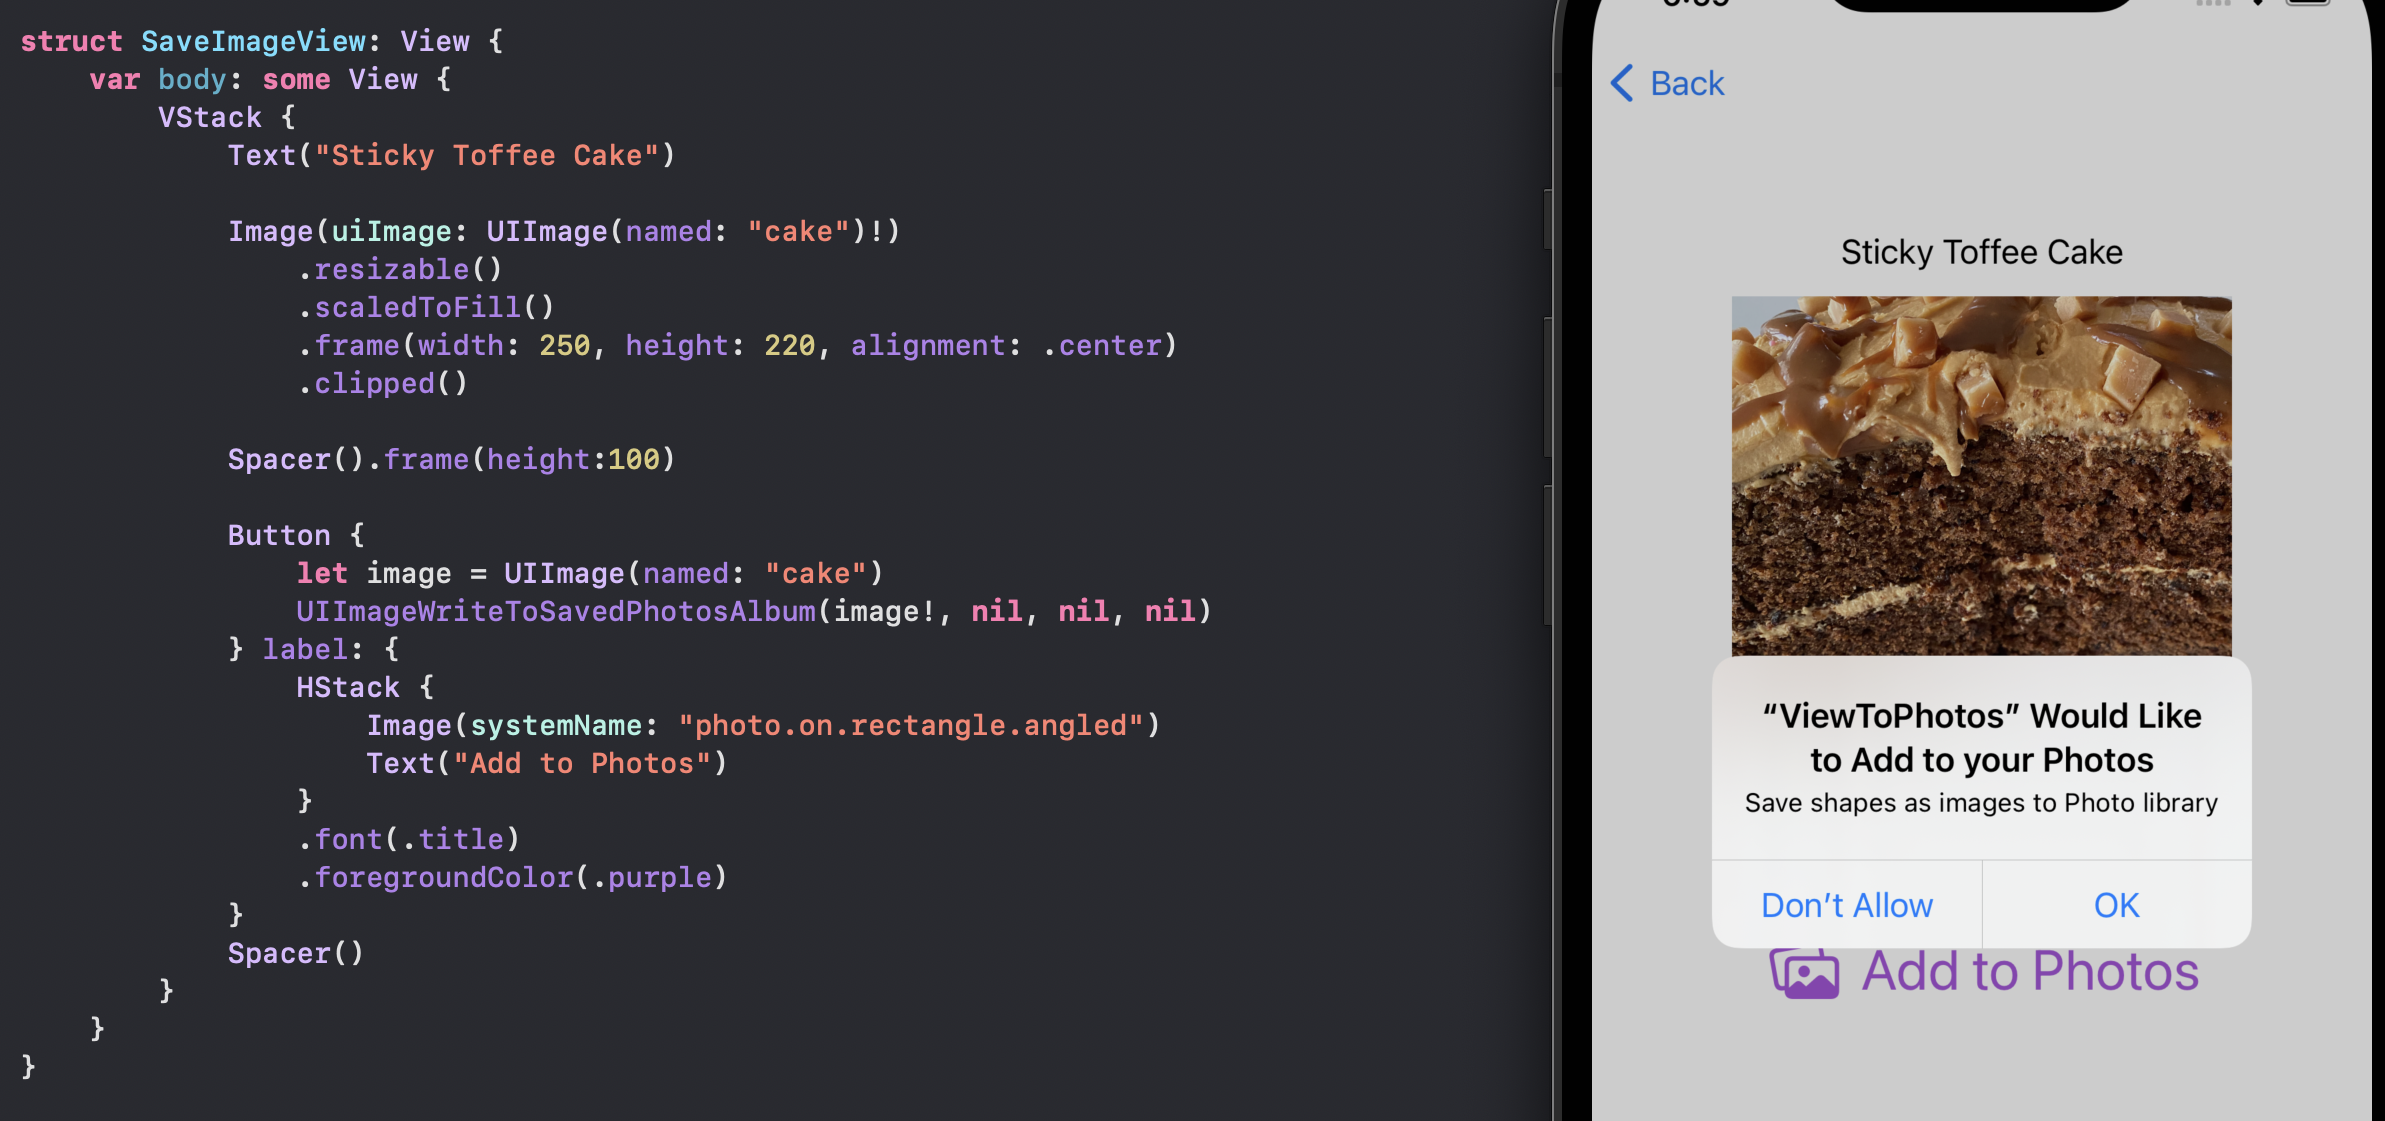
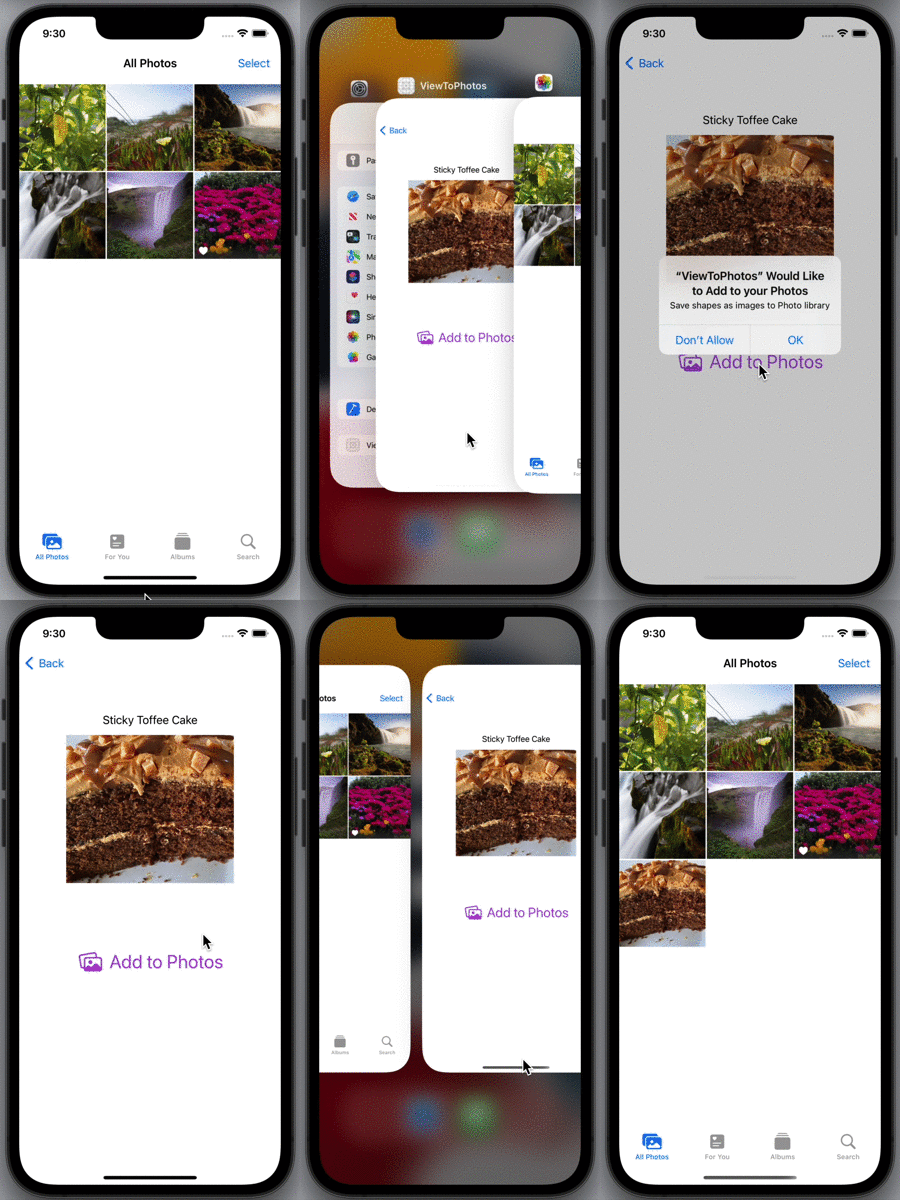
Alert to allow app to access Photo Library
Convert SwiftUI view to Image
UIHostingController is commonly used to host SwiftUI views inside a UIKit view
hierarchy. As such, it can be used to convert the SwiftUI view into a UIImage object.
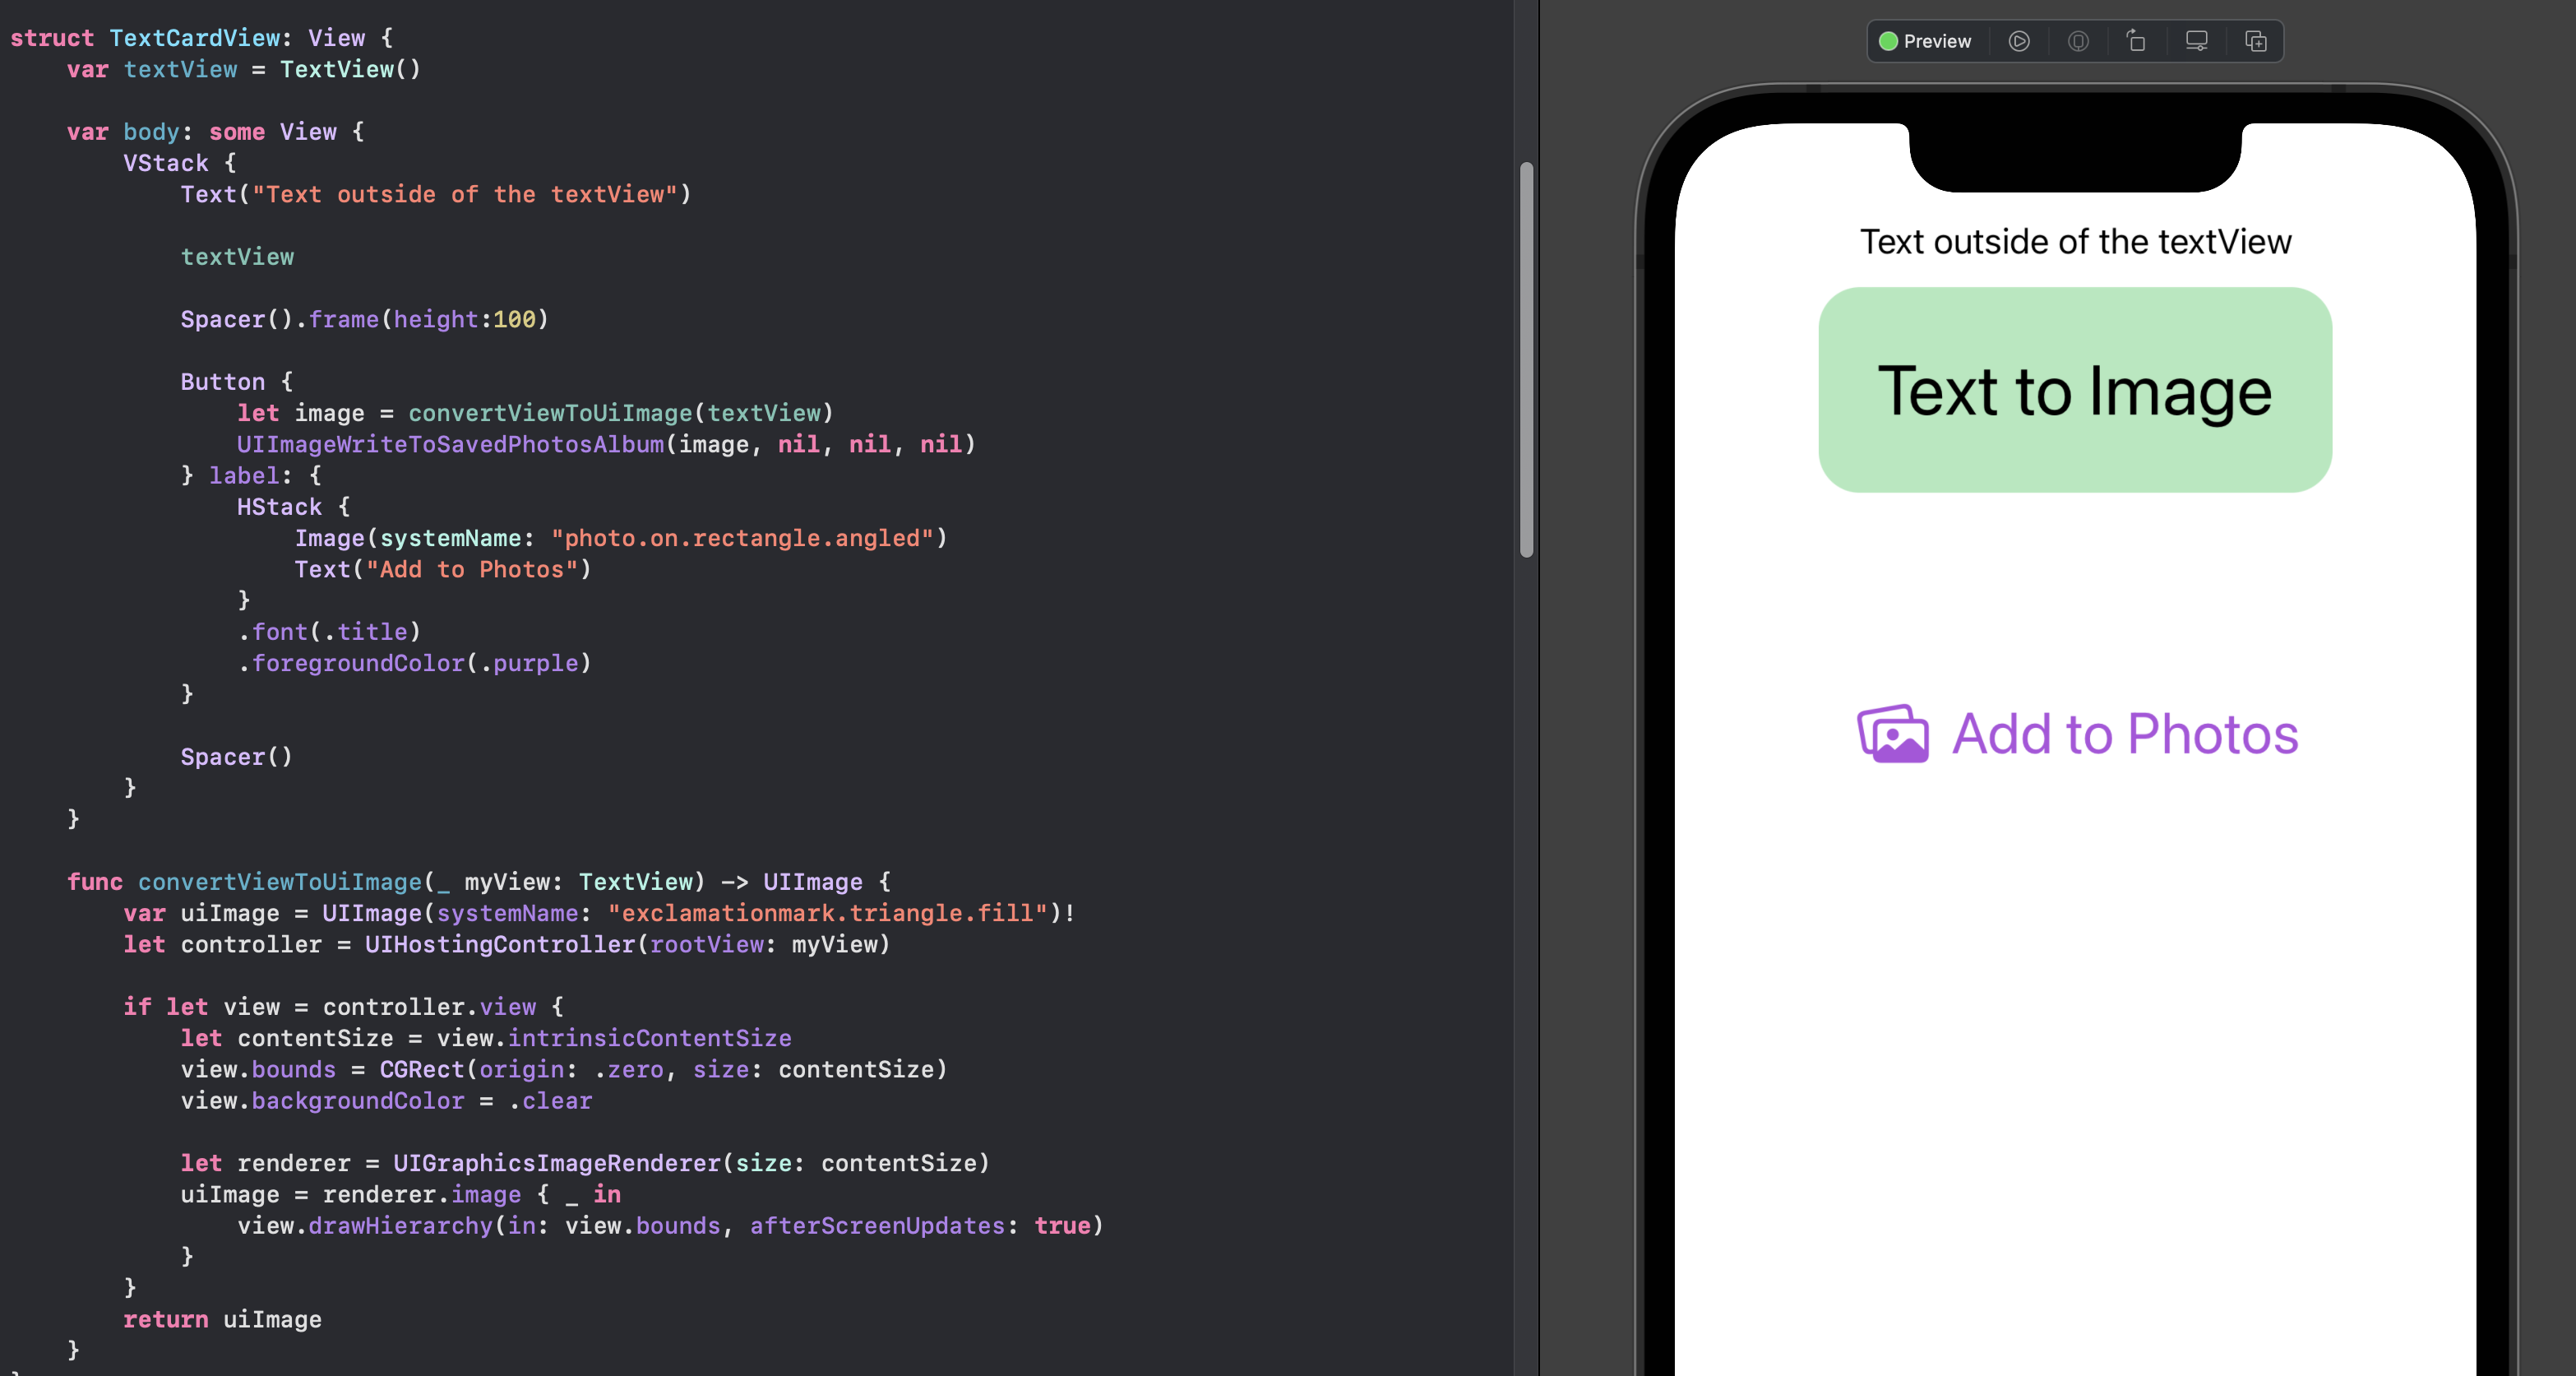
We start with a function convertViewToUiImage in the SwiftUI view that takes a
specific view as a parameter and creates a UIHostingController with the view as the
base. UIGraphicsImageRenderer is used to render a UIImage of the SwiftUI view.
Note that this was initially moving the view down and leaving a blank space at the
top of the image in the Photo Library, until the SwiftUI view was set to ignore the
safe area using edgesIgnoringSafeArea.
 1struct TextView: View {
 2    var body: some View {
 3        Color.green.opacity(0.4)
 4            .cornerRadius(20)
 5            .frame(width: 250, height: 100, alignment: .center)
 6            .overlay(
 7                Text("Text to Image")
 8                    .font(.largeTitle)
 9            )
10            .edgesIgnoringSafeArea(.all)
11    }
12}
 1struct TextCardView: View {
 2    var textView = TextView()
 3
 4    var body: some View {
 5        VStack {
 6            Text("Text outside of the textView")
 7
 8            textView
 9
10            Spacer().frame(height:100)
11
12            Button {
13                let image = convertViewToUiImage(textView)
14                UIImageWriteToSavedPhotosAlbum(image, nil, nil, nil)
15            } label: {
16                HStack {
17                    Image(systemName: "photo.on.rectangle.angled")
18                    Text("Add to Photos")
19                }
20                .font(.title)
21                .foregroundColor(.purple)
22            }
23
24            Spacer()
25        }
26    }
27
28    func convertViewToUiImage(_ myView: TextView) -> UIImage {
29        var uiImage = UIImage(systemName: "exclamationmark.triangle.fill")!
30        let controller = UIHostingController(rootView: myView)
31
32        if let view = controller.view {
33            let contentSize = view.intrinsicContentSize
34            view.bounds = CGRect(origin: .zero, size: contentSize)
35            view.backgroundColor = .lightGray
36
37            let renderer = UIGraphicsImageRenderer(size: contentSize)
38            uiImage = renderer.image { _ in
39                view.drawHierarchy(in: view.bounds, afterScreenUpdates: true)
40            }
41        }
42        return uiImage
43    }
44}

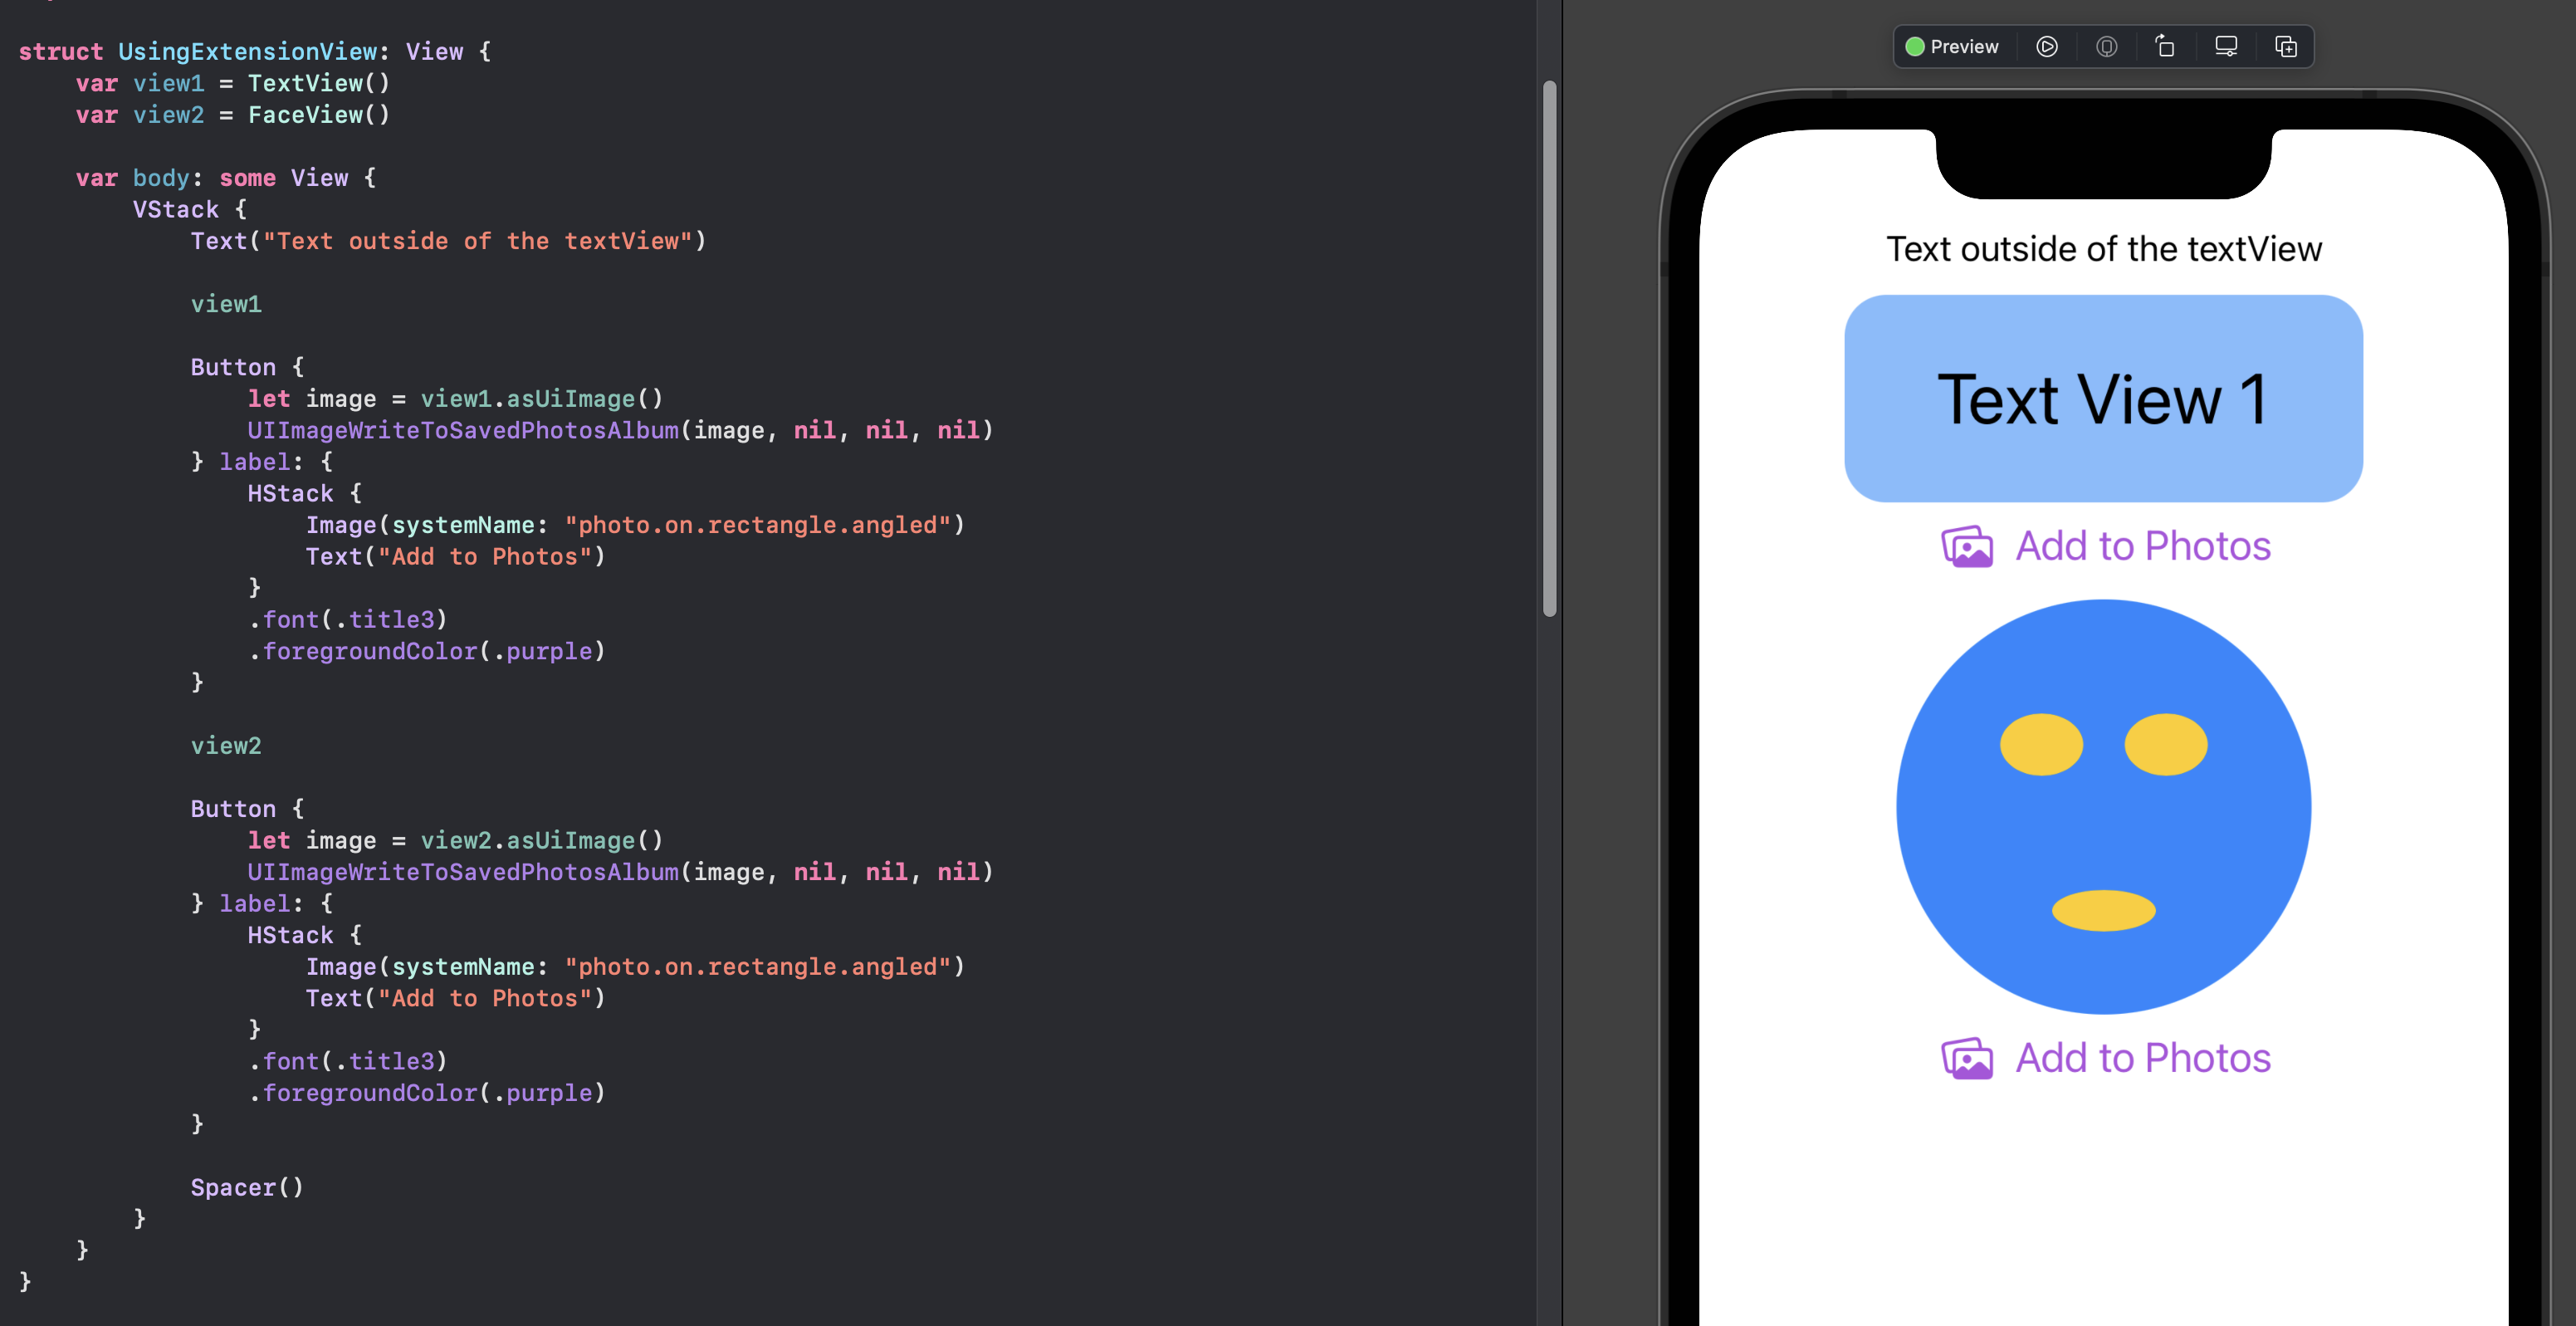
Add extension to view
It is not great having the function convertViewToUiImage in the middle of the
SwiftUI view and it is limited to only working on the textView. It would be better
to define this functionality as an extension to the View protocol so that it could be
used on any view.
 1extension View {
 2    func asUiImage() -> UIImage {
 3        var uiImage = UIImage(systemName: "exclamationmark.triangle.fill")!
 4        let controller = UIHostingController(rootView: self)
 5
 6        if let view = controller.view {
 7            let contentSize = view.intrinsicContentSize
 8            view.bounds = CGRect(origin: .zero, size: contentSize)
 9            view.backgroundColor = .clear
10
11            let renderer = UIGraphicsImageRenderer(size: contentSize)
12            uiImage = renderer.image { _ in
13                view.drawHierarchy(in: view.bounds, afterScreenUpdates: true)
14            }
15        }
16        return uiImage
17    }
18}
 1struct TextView: View {
 2    var body: some View {
 3        Color.blue.opacity(0.5)
 4            .cornerRadius(20)
 5            .frame(width: 250, height: 100, alignment: .center)
 6            .overlay(
 7                Text("Text View 1")
 8                    .font(.largeTitle)
 9            )
10            .edgesIgnoringSafeArea(.all)
11    }
12}
13
14struct FaceView: View {
15    var body: some View {
16        ZStack {
17            Ellipse()
18                .fill(.blue.opacity(0.9))
19                .frame(width: 200, height: 200, alignment: .center)
20            Ellipse()
21                .fill(.yellow)
22                .frame(width: 40, height: 30, alignment: .center)
23                .offset(x: -30, y: -30)
24            Ellipse()
25                .fill(.yellow)
26                .frame(width: 40, height: 30, alignment: .center)
27                .offset(x: 30, y: -30)
28            Path()
29            Ellipse()
30                .fill(.yellow)
31                .frame(width: 50, height: 20, alignment: .center)
32                .offset(x: 00, y: 50)
33        }
34        .frame(width: 200, height: 200, alignment: .center)
35        .edgesIgnoringSafeArea(.all)
36    }
37}
 1struct UsingExtensionView: View {
 2    var view1 = TextView()
 3    var view2 = FaceView()
 4
 5    var body: some View {
 6        VStack {
 7            Text("Text outside of the textView")
 8
 9            view1
10
11            Button {
12                let image = view1.asUiImage()
13                UIImageWriteToSavedPhotosAlbum(image, nil, nil, nil)
14            } label: {
15                HStack {
16                    Image(systemName: "photo.on.rectangle.angled")
17                    Text("Add to Photos")
18                }
19                .font(.title3)
20                .foregroundColor(.purple)
21            }
22
23            view2
24
25            Button {
26                let image = view2.asUiImage()
27                UIImageWriteToSavedPhotosAlbum(image, nil, nil, nil)
28            } label: {
29                HStack {
30                    Image(systemName: "photo.on.rectangle.angled")
31                    Text("Add to Photos")
32                }
33                .font(.title3)
34                .foregroundColor(.purple)
35            }
36
37            Spacer()
38        }
39    }
40}
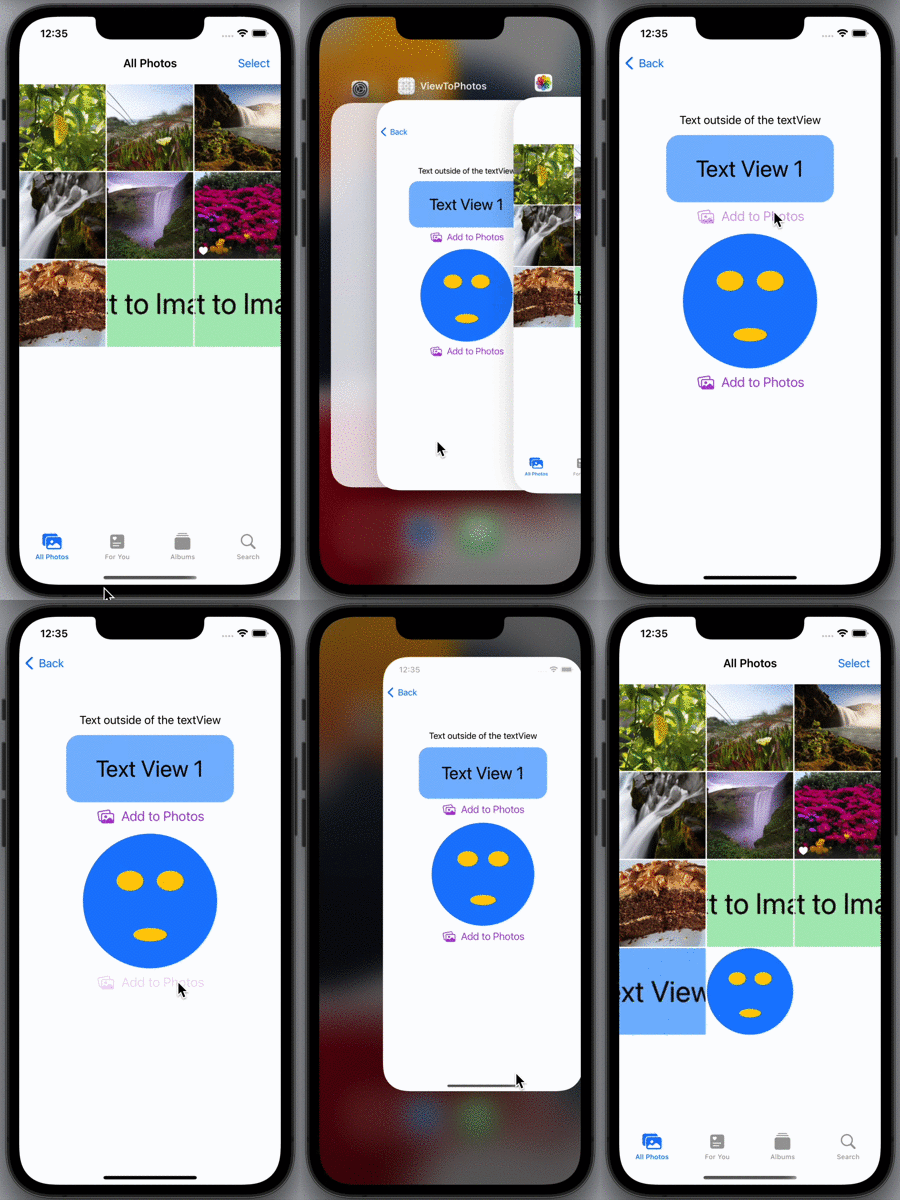
Save SwiftUI views to Photo Library with View extension
Save changes to SwiftUI view to Photos
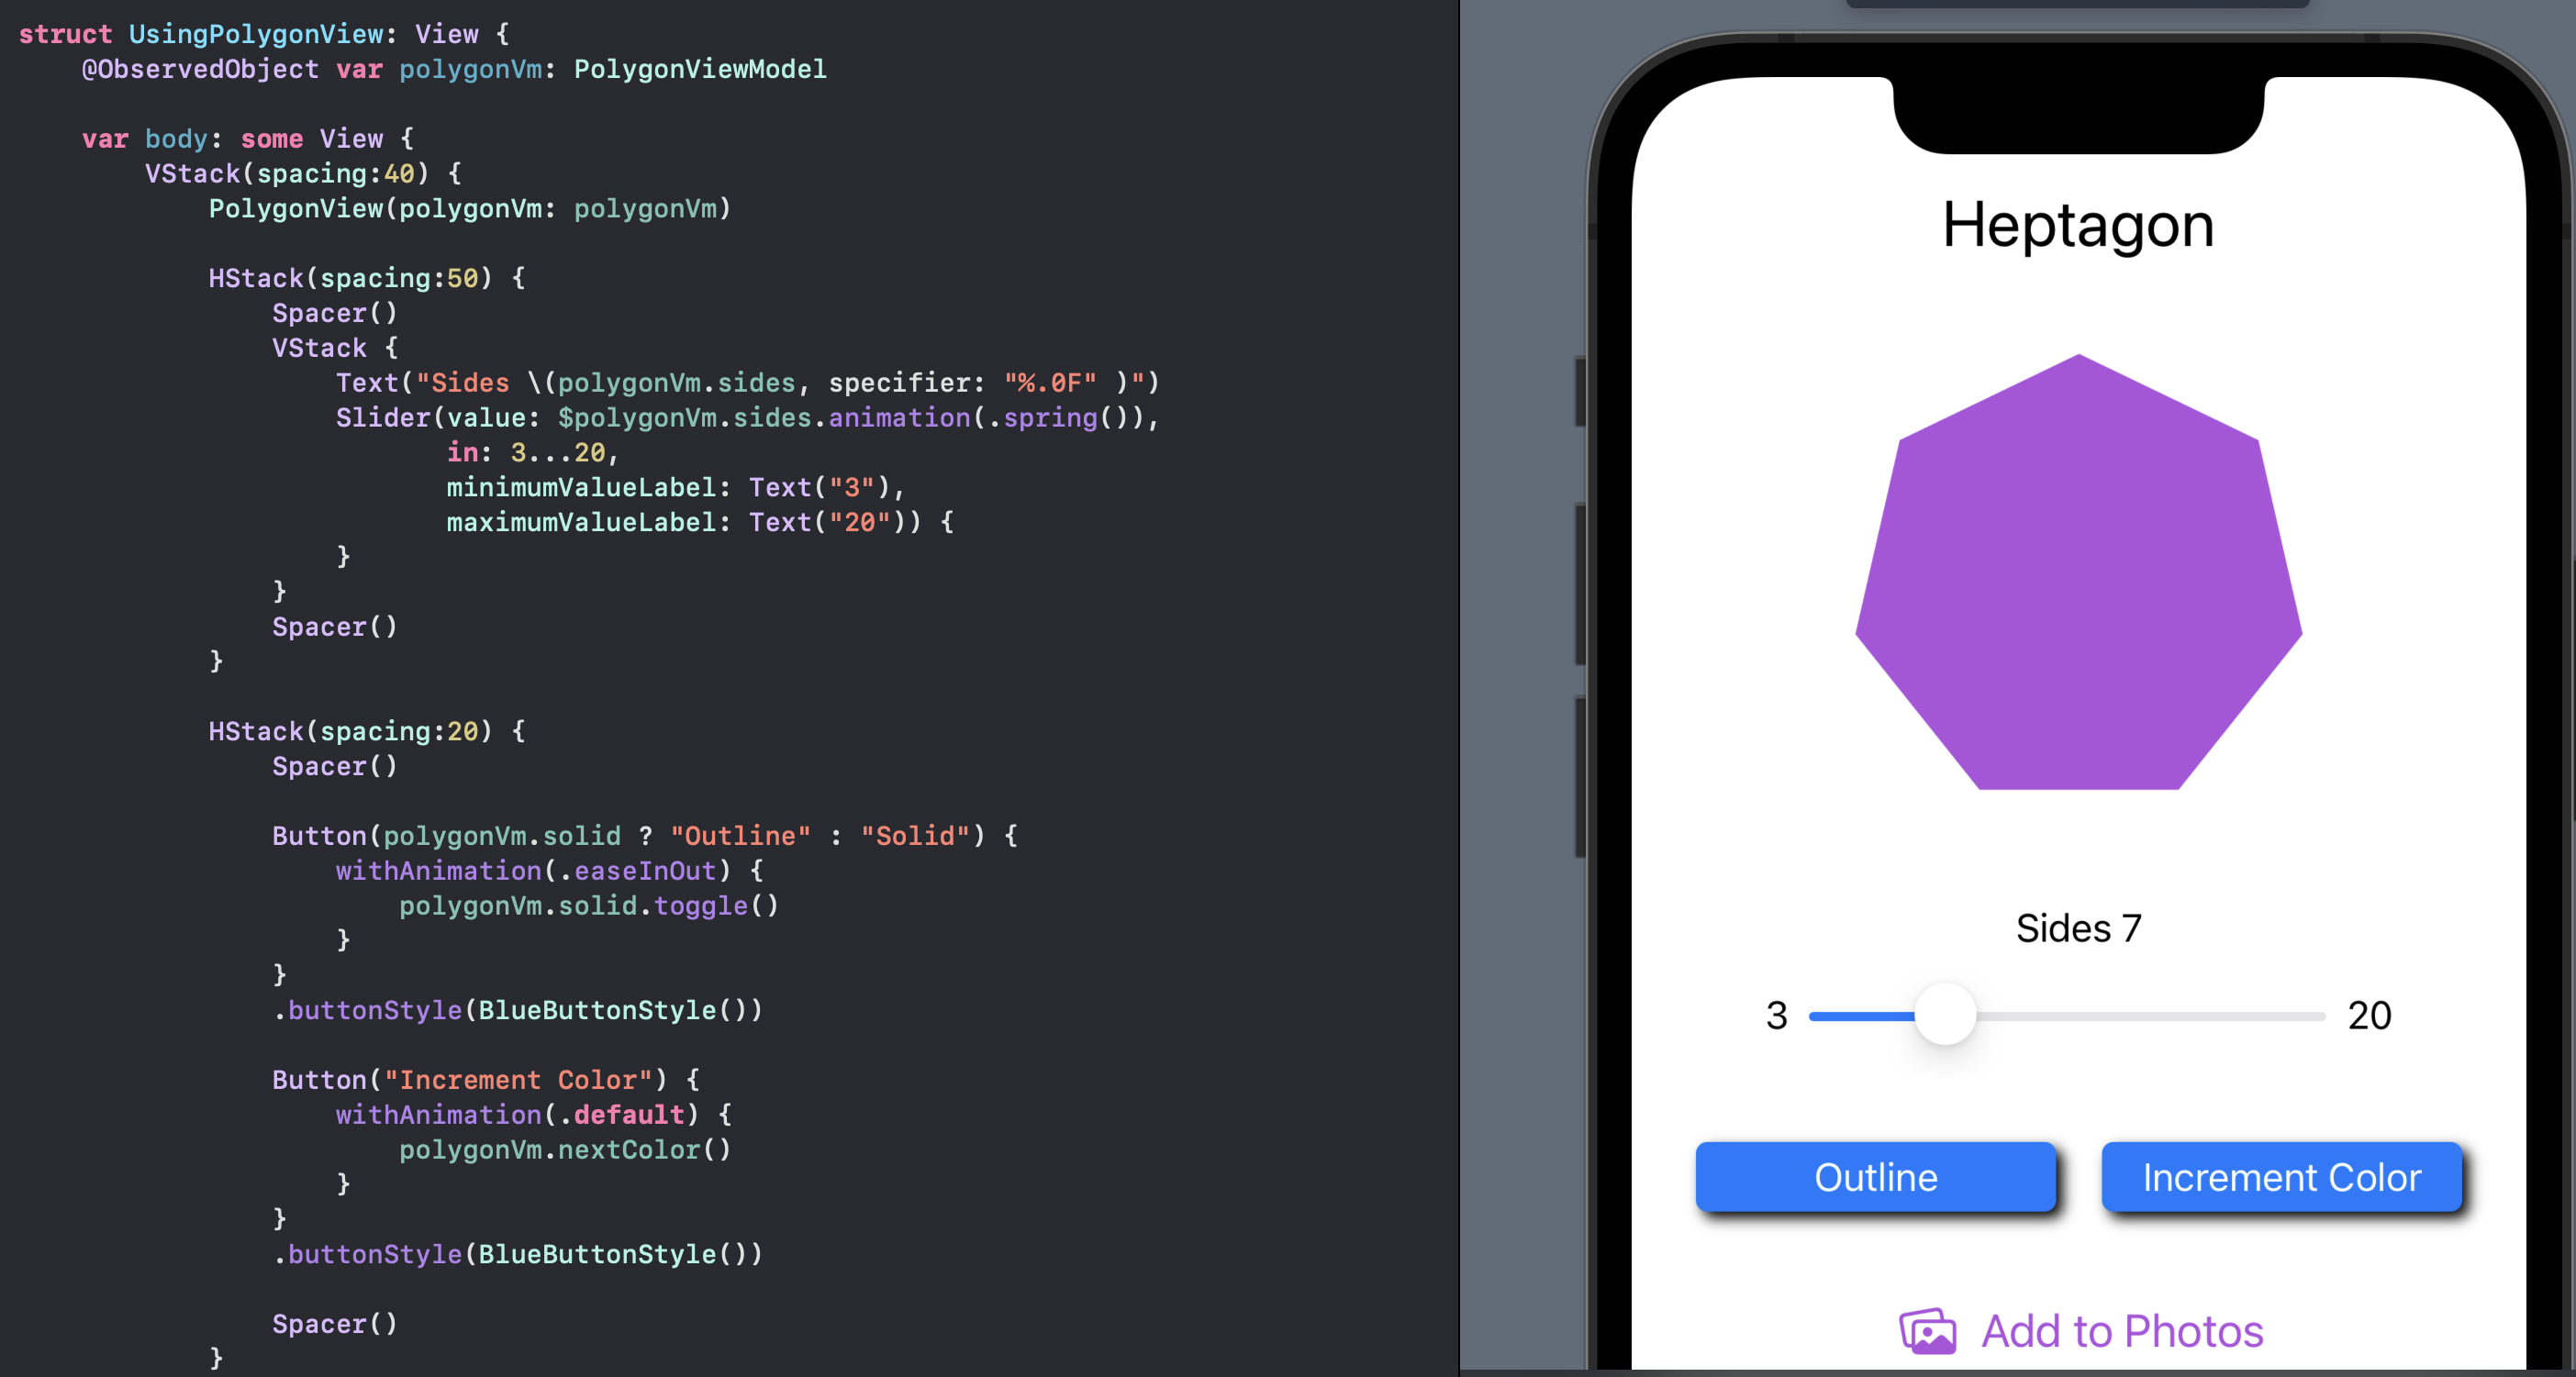
Let's use the Polygon Model and ViewModel as defined in Persist data with
UserDefaults in SwiftUI. A property is added to the Polygon model to return the
name of the shape based on the number of sides in the shape. A PolygonView is
defined to display the polygon shape based on properties in the model. A SwiftUI view
is defined that displays the PolygonView with a slider to change the number of sides
and buttons to change the color and the solid or outline shape.
A button is added to save the PolygonView to Photos. The action of this button
creates a new instance of PolygonView and converts it to a UIImage using the
extension method asUiImage. It is now possible to save a regular polygon shape to
photo library, then change the shape and save another image to Photo library.
 1struct PolygonView: View {
 2    @ObservedObject var polygonVm: PolygonViewModel
 3
 4    var body: some View {
 5        VStack() {
 6            Text(polygonVm.shapeName)
 7                .font(.title)
 8
 9            ZStack {
10                RegularPolygon(sides: Int(polygonVm.sides))
11                    .stroke(polygonVm.solid ? Color.clear : polygonVm.shapeColor, lineWidth: 6.0)
12                RegularPolygon(sides: Int(polygonVm.sides))
13                    .fill(polygonVm.solid ? polygonVm.shapeColor : Color.clear)
14            }
15            .frame(width: 200, height: 200)
16        }
17        .padding()
18    }
19}
 1struct UsingPolygonView: View {
 2    @ObservedObject var polygonVm: PolygonViewModel
 3
 4    var body: some View {
 5        VStack(spacing:40) {
 6            PolygonView(polygonVm: polygonVm)
 7
 8            HStack(spacing:50) {
 9                Spacer()
10                VStack {
11                    Text("Sides \(polygonVm.sides, specifier: "%.0F" )")
12                    Slider(value: $polygonVm.sides.animation(.spring()),
13                           in: 3...20,
14                           minimumValueLabel: Text("3"),
15                           maximumValueLabel: Text("20")) {
16                    }
17                }
18                Spacer()
19            }
20
21            HStack(spacing:20) {
22                Spacer()
23
24                Button(polygonVm.solid ? "Outline" : "Solid") {
25                    withAnimation(.easeInOut) {
26                        polygonVm.solid.toggle()
27                    }
28                }
29                .buttonStyle(BlueButtonStyle())
30
31                Button("Increment Color") {
32                    withAnimation(.default) {
33                        polygonVm.nextColor()
34                    }
35                }
36                .buttonStyle(BlueButtonStyle())
37
38                Spacer()
39            }
40
41            Button {
42                let image = PolygonView(polygonVm: polygonVm)
43                    .edgesIgnoringSafeArea(.all)
44                    .asUiImage()
45                UIImageWriteToSavedPhotosAlbum(image, nil, nil, nil)
46            } label: {
47                HStack {
48                    Image(systemName: "photo.on.rectangle.angled")
49                    Text("Add to Photos")
50                }
51                .font(.title3)
52                .foregroundColor(.purple)
53            }
54
55            Spacer()
56        }
57    }
58}
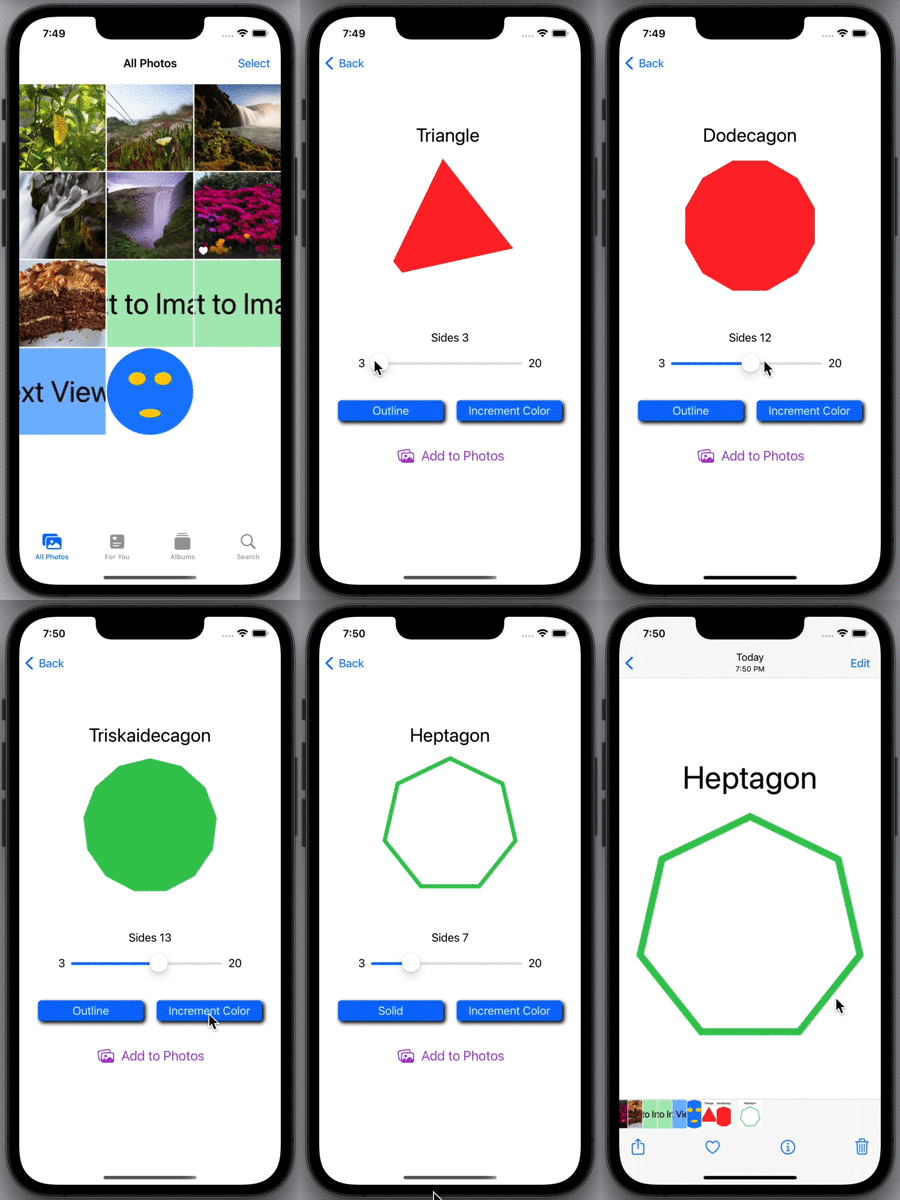
Save different polygon shapes from SwiftUI view to Photo Library
Conclusion
I feel that saving a SwiftUI view as an image in the Photo Library should be native to SwiftUI, but it is not there yet. So it can be done by first converting the SwiftUI view to a UIImage and then saving this to the Photo Library. The NSPhotoLibraryAddUsageDescription property has to be set in the info properties list for the app, with text explaining why the App needs access to Photos. Converting the SwiftUI view to a UIImage is done by defining an extension on the View protocol that uses UIKit to do the conversion. The extension method can then be applied to the view just before sending to the Photo Library.