UI testing with Xcode
User Interface (UI) testing is a type of automated testing where the app is run and the user actions are simulated and the response from the app is measured to ensure correct behavior. This article adds UI tests to the FizzBuzz app.
Apple introduced UI testing in Xcode 7 with the UI tests integrated into the IDE using XCTest. The UI testing framework is made up of 3 key components; the Application; the Elements; and ElementQuery.
- MVVM in SwiftUI
- Unit testing with Xcode
- UI testing with Xcode
Adding UI Tests to iOS App
Xcode provides a checkbox to "Include tests" when choosing options for a new iOS
project. This creates test targets for both Unit Testing and UI Testing. UI Tests can
be added to an existing project by navigating to the Test Navigator, select the
+ button and select "New UI Test Target...". Then fill in the modal dialog that is
presented. The specific project may need to be selected if the solution contains more
than one project. Either approach results in a UI testing template with placeholder
code for test setup and teardown as well as an example UI test and an example
performance test.
 1import XCTest
 2
 3class FizzBuzzUITests: XCTestCase {
 4
 5    override func setUpWithError() throws {
 6        // Put setup code here. This method is called before the invocation of each test method in the class.
 7
 8        // In UI tests it is usually best to stop immediately when a failure occurs.
 9        continueAfterFailure = false
10
11        // In UI tests it’s important to set the initial state - such as interface orientation - required for your tests before they run. The setUp method is a good place to do this.
12    }
13
14    override func tearDownWithError() throws {
15        // Put teardown code here. This method is called after the invocation of each test method in the class.
16    }
17
18    func testExample() throws {
19        // UI tests must launch the application that they test.
20        let app = XCUIApplication()
21        app.launch()
22
23        // Use recording to get started writing UI tests.
24        // Use XCTAssert and related functions to verify your tests produce the correct results.
25    }
26
27    func testLaunchPerformance() throws {
28        if #available(macOS 10.15, iOS 13.0, tvOS 13.0, watchOS 7.0, *) {
29            // This measures how long it takes to launch your application.
30            measure(metrics: [XCTApplicationLaunchMetric()]) {
31                XCUIApplication().launch()
32            }
33        }
34    }
35
36}

Check box to include tests when creating a new project

Modal dialog to add a new UI Test target to a project
Add a UI test to validate initial state
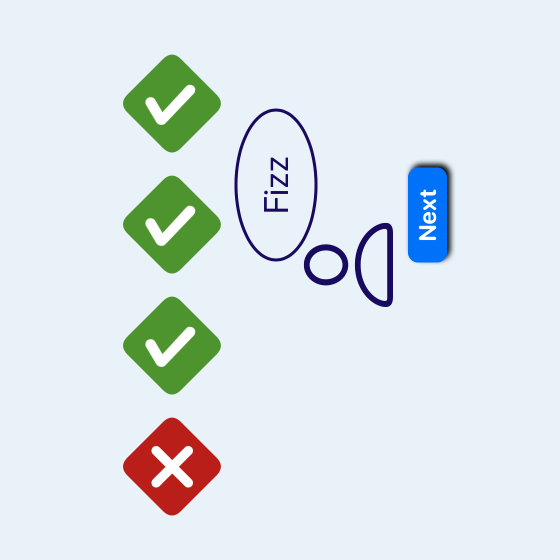
Add a new test to verify that after the app is launched, the callout Text view exists and that the initial value is "1". It is better to wrap the elements in the views with accessibilityIdentifiers to ensure the exact element can easily be found in UI tests. The flow of the UI Test is to launch the App, get an instance of the callout view and then perform validation using XCTAssert. There are two validations, one to validate the element exists and another to validate the initial value is "1". Running the UI test is similar to running the Unit Tests, the play button in the Test Navigator to run all or just a single test. Right-click on a UI Test in the Test Navigator and select run test. There is also a diamond shape in the line numbers in the XCTest file, which can be selected to run the test.
 1class FizzBuzzUITests: XCTestCase {
 2
 3    func test_initialState_CalloutExists() {
 4        let app = XCUIApplication()
 5        app.launch()
 6
 7        let calloutLabel = app.staticTexts["callout"]
 8
 9        XCTAssert(calloutLabel.exists)
10        XCTAssertEqual(calloutLabel.label, "1")
11    }
12
13}
The Text view of GameView is wrapped in accessibilityIdentifier modifier to
identify the Text view for testing.
 1. . .
 2
 3    VStack {
 4        Ellipse()
 5            .stroke(Color(#colorLiteral(red: 0.1215686277, green: 0.01176470611, blue: 0.4235294163, alpha: 1)), lineWidth: 3.0)
 6            .frame(width: 150, height: 80)
 7            .overlay(
 8                Text(data)
 9                    .accessibilityIdentifier("callout")
10                    .foregroundColor(Color(#colorLiteral(red: 0.1215686277, green: 0.01176470611, blue: 0.4235294163, alpha: 1)))
11                    .font(.largeTitle)
12            )
13            .offset(x:30, y:30)
14
15        Image(systemName: "person")
16            .foregroundColor(Color(#colorLiteral(red: 0.1215686277, green: 0.01176470611, blue: 0.4235294163, alpha: 1)))
17            .font(.system(size: 100, weight: .light))
18            .offset(x:-50)
19    }
20
21. . .

Add UI tests to validate behavior
There is not much to the FizzBuzz App, so there are just a few UI Tests to cover the
different scenarios. Tests are added to validate the initial state of the Next
button as well as validating changes to the callout label when the next button is
tapped. All these tests run and pass, although there is some repetition.
 1class FizzBuzzUITests: XCTestCase {
 2
 3    func test_initialState_calloutExists() {
 4        let app = XCUIApplication()
 5        app.launch()
 6
 7        let calloutLabel = app.staticTexts["callout"]
 8
 9        XCTAssert(calloutLabel.exists)
10        XCTAssertEqual(calloutLabel.label, "1")
11    }
12
13    func test_initialState_nextButtonExists() {
14        let app = XCUIApplication()
15        app.launch()
16
17        let nextButton = app.buttons["nextButton"]
18
19        XCTAssert(nextButton.exists)
20    }
21
22    func test_tapNextButton_calloutIs2() {
23        let app = XCUIApplication()
24        app.launch()
25
26        let nextButton = app.buttons["nextButton"]
27        nextButton.tap()
28
29        let calloutLabel = app.staticTexts["callout"]
30        XCTAssertEqual(calloutLabel.label, "2")
31    }
32
33    func test_tapNextButtonTwice_calloutIsFizz() {
34        let app = XCUIApplication()
35        app.launch()
36
37        let nextButton = app.buttons["nextButton"]
38        nextButton.tap(withNumberOfTaps: 2, numberOfTouches: 1)
39
40        let calloutLabel = app.staticTexts["callout"]
41        XCTAssertEqual(calloutLabel.label, "Fizz")
42    }
43
44    func test_tapNextButton9_calloutIsBuzz() {
45        let app = XCUIApplication()
46        app.launch()
47
48        let nextButton = app.buttons["nextButton"]
49        nextButton.tap(withNumberOfTaps: 9, numberOfTouches: 1)
50
51        let calloutLabel = app.staticTexts["callout"]
52        XCTAssertEqual(calloutLabel.label, "Buzz")
53    }
54
55    func test_tapNextButton14_calloutIsFizzBuzz() {
56        let app = XCUIApplication()
57        app.launch()
58
59        let nextButton = app.buttons["nextButton"]
60        nextButton.tap(withNumberOfTaps: 9, numberOfTouches: 1)
61        nextButton.tap(withNumberOfTaps: 5, numberOfTouches: 1)
62
63        let calloutLabel = app.staticTexts["callout"]
64        XCTAssertEqual(calloutLabel.label, "FizzBuzz")
65    }
66
67}

UI Tests are not Unit Tests
The initial tests seem OK, but these are too granular for UI Tests. These six tests
are really just testing two scenarios. One is the initial state when the app is
launched and the second is the effect of tapping the Next button. The code to
launch the App for each test is also repeated, this can be moved to the test setup
method.
First, create a member variable for the app and launch the app in setUpWithError. This cleans up each of the tests.
 1class FizzBuzzUITests: XCTestCase {
 2    let app = XCUIApplication()
 3
 4    override func setUpWithError() throws {
 5        app.launch()
 6
 7        continueAfterFailure = false
 8    }
 9
10    func test_initialState_calloutExists() {
11        let calloutLabel = app.staticTexts["callout"]
12
13        XCTAssert(calloutLabel.exists)
14        XCTAssertEqual(calloutLabel.label, "1")
15    }
16
17    func test_initialState_nextButtonExists() {
18        let nextButton = app.buttons["nextButton"]
19
20        XCTAssert(nextButton.exists)
21    }
22
23    func test_tapNextButton_calloutIs2() {
24        let nextButton = app.buttons["nextButton"]
25        nextButton.tap()
26
27        let calloutLabel = app.staticTexts["callout"]
28        XCTAssertEqual(calloutLabel.label, "2")
29    }
30
31    func test_tapNextButtonTwice_calloutIsFizz() {
32        let nextButton = app.buttons["nextButton"]
33        nextButton.tap(withNumberOfTaps: 2, numberOfTouches: 1)
34
35        let calloutLabel = app.staticTexts["callout"]
36        XCTAssertEqual(calloutLabel.label, "Fizz")
37    }
38
39    func test_tapNextButton9_calloutIsBuzz() {
40        let nextButton = app.buttons["nextButton"]
41        nextButton.tap(withNumberOfTaps: 9, numberOfTouches: 1)
42
43        let calloutLabel = app.staticTexts["callout"]
44        XCTAssertEqual(calloutLabel.label, "Buzz")
45    }
46
47    func test_tapNextButton14_calloutIsFizzBuzz() {
48        let nextButton = app.buttons["nextButton"]
49        nextButton.tap(withNumberOfTaps: 9, numberOfTouches: 1)
50        nextButton.tap(withNumberOfTaps: 5, numberOfTouches: 1)
51
52        let calloutLabel = app.staticTexts["callout"]
53        XCTAssertEqual(calloutLabel.label, "FizzBuzz")
54    }
55
56}
Second, combine the UI tests into two tests. UI Tests can have multiple steps with validation interspersed with activity. This is one of the differences between UI Tests and Unit Tests and as a result a UI Test can fail for a number of reasons. These reasons should be closely related and the tests results should be easy to reproduce and the tests easy to debug.
 1class FizzBuzzUITests: XCTestCase {
 2    let app = XCUIApplication()
 3
 4    override func setUpWithError() throws {
 5        app.launch()
 6
 7        continueAfterFailure = false
 8    }
 9
10    func test_initialState_buttonAndCallout() {
11        let calloutLabel = app.staticTexts["callout"]
12        XCTAssert(calloutLabel.exists)
13        XCTAssertEqual(calloutLabel.label, "1")
14
15        let nextButton = app.buttons["nextButton"]
16        XCTAssert(nextButton.exists)
17    }
18
19    func test_tapNextButton_calloutIsValid() {
20        let nextButton = app.buttons["nextButton"]
21        let calloutLabel = app.staticTexts["callout"]
22
23        nextButton.tap()
24        XCTAssertEqual(calloutLabel.label, "2")
25
26        nextButton.tap()
27        XCTAssertEqual(calloutLabel.label, "Fizz")
28
29        nextButton.tap(withNumberOfTaps: 7, numberOfTouches: 1)
30        XCTAssertEqual(calloutLabel.label, "Buzz")
31
32        nextButton.tap(withNumberOfTaps: 5, numberOfTouches: 1)
33        XCTAssertEqual(calloutLabel.label, "FizzBuzz")
34    }
35
36}

Device orientation
UI Tests are closer to testing what the customer will experience on a device. As such, one feature of UI testing with XCTest is changing the orientation of the device using XCUIDevice. The following test first sets the device orientation to landscape and then taps the next button and validates the callout text.
 1    func test_landscapeTapNextButton_calloutIsValid() {
 2        let device = XCUIDevice.shared
 3        device.orientation = .landscapeRight
 4
 5        let nextButton = app.buttons["nextButton"]
 6        let calloutLabel = app.staticTexts["callout"]
 7
 8        nextButton.tap()
 9        XCTAssertEqual(calloutLabel.label, "2")
10
11        nextButton.tap()
12        XCTAssertEqual(calloutLabel.label, "Fizz")
13
14        nextButton.tap(withNumberOfTaps: 7, numberOfTouches: 1)
15        XCTAssertEqual(calloutLabel.label, "Buzz")
16
17        nextButton.tap(withNumberOfTaps: 5, numberOfTouches: 1)
18        XCTAssertEqual(calloutLabel.label, "FizzBuzz")
19    }
It is worth noting that the order in which the UI Tests are run is not determined, so the setup method needs to be modified to set the device orientation to portrait.
1    override func setUpWithError() throws {
2        let device = XCUIDevice.shared
3        device.orientation = .portrait
4        app.launch()
5
6        continueAfterFailure = false
7    }

Failing UI Test
To give an example of a failing UI Test, there is a large vertical space set between the callout anf the next button. Then when the device is rotated to landscape, the next button is not visible on screen. This also shows how a similar test runs and passes in portrait orientation, but fails in landscape orientation.
Add vertical space between the callout and the next button.
 1struct FizzBuzzView: View {
 2
 3    . . .
 4
 5     VStack {
 6         Spacer()
 7             .frame(height:50)
 8
 9         Text("Fizz Buzz Game")
10             .font(.title)
11
12         GameView(data: fizzBuzzVm.data)
13
14         Spacer()
15             .frame(height:250)
16
17         Button("Next") {
18             fizzBuzzVm.increment()
19         }
20         .accessibilityIdentifier("nextButton")
21         .buttonStyle(BlueButtonStyle())
22
23         Spacer()
24     }
25
26    . . .
There is no change required to the landscape UI test.
 1    func test_landscapeTapNextButton_calloutIsValid() {
 2        let device = XCUIDevice.shared
 3        device.orientation = .landscapeRight
 4
 5        let nextButton = app.buttons["nextButton"]
 6        let calloutLabel = app.staticTexts["callout"]
 7
 8        nextButton.tap()
 9        XCTAssertEqual(calloutLabel.label, "2")
10
11        nextButton.tap()
12        XCTAssertEqual(calloutLabel.label, "Fizz")
13
14        nextButton.tap(withNumberOfTaps: 7, numberOfTouches: 1)
15        XCTAssertEqual(calloutLabel.label, "Buzz")
16
17        nextButton.tap(withNumberOfTaps: 5, numberOfTouches: 1)
18        XCTAssertEqual(calloutLabel.label, "FizzBuzz")
19    }

Obviously, this failing test could be resolved by removing the vertical space. It could also be resolved by embedding the view in a ScrollView, so the view can be scrolled to get to the next button. In the UI Tests the view will be scrolled to perform actions on UI elements.
 1    . . .
 2
 3       ScrollView {
 4           VStack {
 5               Spacer()
 6                   .frame(height:50)
 7
 8               Text("Fizz Buzz Game")
 9                   .font(.title)
10
11               GameView(data: fizzBuzzVm.data)
12
13               Spacer()
14                   .frame(height:250)
15
16               Button("Next") {
17                   fizzBuzzVm.increment()
18               }
19               .accessibilityIdentifier("nextButton")
20               .buttonStyle(BlueButtonStyle())
21
22               Spacer()
23           }
24           .frame(maxWidth: .infinity, maxHeight: .infinity)
25       }
26
27    . . .

Conclusion
UI Testing is a way to perform end-to-end testing of an App both in simulated devices and on targeted devices. XCTest in Xcode provides a way to create and run UI Tests as well as Unit Tests. This article added UI Tests to the FizzBuzz App in simulated iPhone 12 in portrait and landscape orientation.
UI Tests do not replace Unit Tests and test the application as a whole. UI Tests tend to be larger and run more slowly than Unit Tests as there is more setup and there is multiple validations in a single UI Test. The purpose of UI Tests is to focus on the customer interactions with the App and test the critical features as well as different aspects of the device such as orientation.